Monday, September 29, 2008
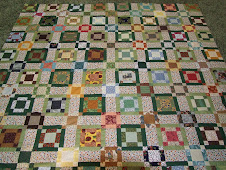
98 Kitties for Ruth.....2006
Friday, September 26, 2008
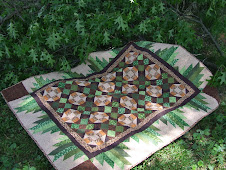
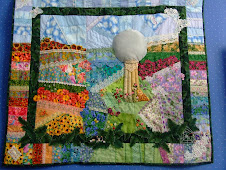
When the Mountain is Out......2003
I hope that neither my Seattle sister, Marge or fellow blogger, Katney laugh at this one!
This was my salute to Mt. Rainier that I dreamed up on one of our trips to Seattle. I literally designed this in my head while traveling up Mt. Rainier for a picnic with all of my family! It was loosely based on a photo that Mike took the first year we were out there with the mountain in the background and flowers in the foreground. This particular year I was seeing purple flowers along the road as we went up the mountain.
I purposely photographed this from a distance. I was trying out the "watercolor" technique (sort of) where you use a fusible grid and apply 2" squares of fabric to it to make your picture. It is meant to be seen from a distance to lose the idea of squares......like the pixels on the computer. If I stand in our bedroom and don't have my glasses on.....it looks best :-)
This is a little closer. After sewing down the fused grid, I went back and tried to machine quilt it....badly. The idea was for it to look like the mountain in the distance and tall purple flowers up close, with trees and scrub in between. Oh, well.....another learning experience!
The title was easy, since Seattle residents always talk in terms of "when the mountain is out...". I used a photo on the label and it is really stiff for some reason....I don't think I did it right and also sewed it on badly.
This is a little closer. After sewing down the fused grid, I went back and tried to machine quilt it....badly. The idea was for it to look like the mountain in the distance and tall purple flowers up close, with trees and scrub in between. Oh, well.....another learning experience!Saturday, September 20, 2008
Fall projects in progress.....
I decided that I might as well include things that I'm working on and even give some details of how to make them for the quilters who read this. I saw a small wall quilt in the September/October issue of "Fons & Porter's Love of Quilting" Magazine that featured fall colors with pumpkins, a ghost and a bat. I liked the look, but wanted something that was not Halloween only. So I followed their general instructions and then changed the appliques to what I wanted! This is the top project in the picture below.
At our next Quilt Guild meeting we are suppose to bring something to be auctioned off for charity, so I decided to make something similar as a runner. When I got the top of the runner finished, I realized that I had more use for a runner than a wall hanging, so I will give the wall hanging to the guild and keep the runner! Neither is complete in the above picture. The wall hanging needs to have the binding sewn down in back and the runner is just a top at this stage ready for me to blanket stitch the appliques.
Picking the fabric is the fun part and I wanted fall colors that more or less matched what they used in the magazine.....only a little brighter and less "country" :-)
Since this project is in a magazine, I don't know if it is OK to give the deminisions I used or not! My strips were cut 2 1/2" by 4 1/2" wide.
You add a 4 1/2 " corner square. In the original they applique candy corn in the corners.
(I was still playing with what I wanted on it in this photo with it hanging on my design wall.) Once the top is assembled, I used WonderUnder to fuse the leaves and pumpkins and such to the top and then blanket stitch around them. I free handed the pumpkin patterns and found leaves to trace on-line and in books.
I can't do the nice free-motion quilting they did in the magazine so I just marked off a grid and quilted the center area of the wall hanging. I probably won't do that much on the runner for myself! I've really got to work on my quilting.....both hand and machine!
I used left over strips cut narrower for the runner and a different center fabric.
I've got a lot of stitching to do! I'll add completed pictures later when they are done. Our meeting is the first Wednesday in October, so I need to get that binding sewn down first!
Friday, September 19, 2008
But will it sell?.....the world of craft fairs
Will it sell? Is it worth the hassle of craft fairs? Will you make money?
Well.......my resounding answer to all of those is "NO"!
The church I used to belong to had a craft fair every October, and the last couple of years, I not only helped make stuff for them to sell but also bought a table and tried to sell stuff for myself. What an experience. I seldom made enough money to cover the cost of my table and it kept me away from making the stuff I really wanted to make.
I got pretty "creative" with my own designer logos and tags. My main lines were "Book Bags & Beyond", "Fabulous Fabric Fortune Cookies", "Tea for Two" and "Seasonal Pillow Shams". There were lots of misc. items that didn't fall in any of those categories.......pin cushions, needle cases, bags to hang on walkers, table runners, polar fleece hats, a few small wall hangings, and I sold quite a few lap quilts, but only by special order to friends. Another probolem with selling, is that anyone who makes crafts themselves, just looks at what you did.....and goes home and makes their own. I know because I've done that, too!
Reversable book bags are my favorite thing to make. It allows me to play with making one block and then just turning it into a bag. I sold quite a few....some aren't shown here and I also gave away a lot to friends and family, so it gets confusing!
These are the 2 that I personally carry. They are great for books or for something like carrying your knitting around. The hardest part of trying to sell stuff for me, was pricing it. People do not want to pay for your time. I on the other hand, do not want to work for a quarter an hour. Even small items take time and of course materials! A bag like this takes 2-3 fat quarters plus some batting in the front area and the webbing for handles. I can't sell something like this for $5 even if you CAN go buy something just as nice in a store! That is the biggest problem.....there are handcrafted items being mass produced in third world countries where people are happy to get 25 cents an hour!
This was a bag I made for a friend who is a bird carver. It has no handles in this photo because I was not done with it. Making gifts and making things to sell at the same time was way too time consuming and I wasn't making any real money! I'd rather make gifts for family and friends. Every time my sister bought something from me, I felt so guilty! I do not have the heart of a merchandiser.
My second favorite thing to make are these tea cup coasters and other coasters. All of these were Christmas gifts one year for everyone in the family! I also made tea bag wallets to carry tea bags in your purse.
A lady in a red hat group hired me to make several as Christmas gifts and even gave me the material to make them! I made a red hat bag for a friend, also.
Fabulous Fabric Fortune Cookies!.......seemed like such a good idea when I started making them! I even have little carry-out Chinese boxes left from our daughter's wedding to put them in with a sticker covering up the wedding stickers we had on them! However they are a bit of a pain to make and I never came up with a good closure. I have velcro on them, but think it looks ugly. It is also very hard to explain to people how to fold them! I have a handful of these left. You can stick in messages for any occasion or even tuck in some money for a gift to kids.
These are sure dated!......cell phone pockets for when the phones were bigger and didn't close up! LOL! Later I pushed them as cases to carry your rotary cutter in, or I have a chalk marking set in the one on the left that I carry to classes and such.
Our church craft group specialized in shirts and this is one that I made for the church to sell. I always liked this guy :-) I liked the idea so much I later used it on two other items......
One was this wall banner for my daughter, which she probably doesn't even use, but I think it is cute! I loved the spider and there is beaded fringe on the bottom edge.
Reversable book bags are my favorite thing to make. It allows me to play with making one block and then just turning it into a bag. I sold quite a few....some aren't shown here and I also gave away a lot to friends and family, so it gets confusing!
My second favorite thing to make are these tea cup coasters and other coasters. All of these were Christmas gifts one year for everyone in the family! I also made tea bag wallets to carry tea bags in your purse.
Our church craft group specialized in shirts and this is one that I made for the church to sell. I always liked this guy :-) I liked the idea so much I later used it on two other items......I later used the same idea on a pillow sham for my "Seasonal Pillow Shams" collection that never sold.
I made this vest for the church to sell and it actually did! I think I added an assortment of mismatched gold buttons to one side...can't remember. Maybe that was a different vest.
Do you remember making these woven hearts in school at Valentine's Day??? I saw this idea on-line. You fuse 2 pieces of fabric together and then cut out the pieces and weave them together! The pattern in on-line somewhere. They are like little baskets and you can hang them on the the tree and put candy in them.
A couple of the table runners I sold. Some of these photos are before I had a digital camera and are terrible, but I no longer have the items to photograph.
So......I did some digging around to see what I have left-over after all this time! I can't believe that I still have this stuff! Actually some of it was not my best efforts and I know that I do better work now.
I see: 4 pillow shams....I always liked that pink flowered one, but it doesn't go with my house. I put the Halloween guy on my couch last year and I guess I will again this year. He was cuter on the shirt I made originally.
One baby quilt....tied, not quilted. I wish that I could quilt it now that I have more confidence for simple machine quilting, but it is not stretched tightly enough to do it without taking the binding off. I am sure I will have a friend with a baby to give it to eventually! I even made a rather poor bib and toy star to go with it :-)
One reversable vest......I just liked this piece of velour fabric. The vest is too small for me. It is very soft and at one time it had a piece of old lace made into a pin and attached to it, but must have used it for something else.
A couple of the table runners I sold. Some of these photos are before I had a digital camera and are terrible, but I no longer have the items to photograph.So......I did some digging around to see what I have left-over after all this time! I can't believe that I still have this stuff! Actually some of it was not my best efforts and I know that I do better work now.
1 fall wall hanging...I had it on a wooden rod, but it needs a hanging sleeve to look better.
1 red polar fleece hat
A pile of bags to hang on walkers which I will probably give to nursing homes. A woman at an assisted living place asked me to make these for a craft fair they were having and not a one of them sold.
1 rather weird red velour purse
1not very attractive Bible cover.....no wonder this did not sell!
5-6 fortune cookies in so-so fabric
Except for the pillow shams, I think I see why this bunch is left-overs!
My last 4 bags.....I've given away a dozen or more just to get them out of the house! That little green one is very unattractive....what was I thinking?????
Well....that is my experience with the world of craft fair selling and why I no longer do it! It just takes time away from making more quality projects, and the good stuff you cannot sell for the money it is worth! Adding prices to stuff automatically made me lose all confidence in what I had to sell.
I felt guilty every time I sold something, like I should apologize for asking for money!
Thursday, September 18, 2008
Rail Fence....2001, 2003, 2005
This post is about 3 different Rail Fence Quilts that I made. The first one is our bed quilt. It is HUGE and I don't know why I made it so big! We have a queen size bed and this is easily king size and didn't need to be. I added large borders to make it bigger (for some idiotic reason that now escapes me!) Getting one of the deeper mattresses and box springs has helped, but it still drags the floor.
Rail Fence is a great beginner pattern. This was one of my earliest bed quilts and I needed easy! It is just strips of fabric sewn together and then cut into squares.
I chose the fabric from the colors in this wallpaper border. They are not colors I would normally choose and I had a hard time coming up with 7 different ones I liked going from light to dark.
I had it machine quilted by a local quilter....Kathy M. She did a very nice job! I added that little extra border on two sides because I had the left over pieces from cutting the squares and it seemed like a good idea at the time.
These wide borders were a big mistake. Beginner's ignorance :-) I should rip the binding loose and cut a bunch off, but I'm too lazy to go back to a long finished project.
I did not know how to putting binding on....that is how new I was! My sister Marge was visiting for my daughters wedding (2 days before 9/11) Since she was stuck in Evansville for a week before she could fly home, she showed me how to put binding on and we sat in my front yard and sewed it down while listening to the radio. No one took a picture of us, but here she is at my other sister's house working on an afghan. Marge not only taught me a lot of things, she provided most of my tools.....cutting table, mat, ruler, rotary cutter! I made this top in 2000 and got it bound in 2001.

My second Rail Fence was for a good friend who wanted a lap quilt. I call this one Betty's Blues because she loves blue! I tied this one.
She provided me with these pictures for my files. This one was in 2003.
The third one, I call "Blackberry Tea". I had made the top and was trying to sell it. My nephew was getting married in 2005 to a very lovely Korean girl and my sister, Dorothy wanted a handmade quilt to send to Abi's mother in Korea. She liked this top and bought it from me (My "wealthy patron", she is the only one who ever bought much of my stuff.....another story!) She bought a satin like fabric for the back and had someone in Tucson machine quilt it. Then she brought it back here on a trip to visit me.
This time Mike took a picture.......Dorothy and me binding the edges while enjoying the outdoor air. I love to work outdoors, except for rounding up all the stuff I need and carrying it out there!

My second Rail Fence was for a good friend who wanted a lap quilt. I call this one Betty's Blues because she loves blue! I tied this one.
She provided me with these pictures for my files. This one was in 2003.This pattern is a very easy beginner quilt and can be arranged in different ways for different looks. I have made quick baby quilts using this pattern, too.
Tuesday, September 16, 2008
Mary's Quilt Thoughts #3.....
Quilting should be fun! Working to have perfect points and perfect stitching is great.....if that is what you enjoy doing. But not every quilter wants to be a "quilt show class" quilter. Quilting should be an expression of what you like to do........playing with color and lovely fabric, trying out techniques that please you, learning to do the sort of quilting that you enjoy and not what you need to "work" on, making gifts for family and friends and good causes. If you want to use a strange color combo or add embellishments that other people don't understand....go for it! It only has to please you!
Monday, September 15, 2008
A Dome For All Seasons......2003
This first picture is to show you the problem with photographing this one! It is high on the wall in my entryway over a winding staircase that is hard to stand on.
I saw a Simply Quilts show about making a house block quilt and decided it would be fun to make house blocks for every season/month with different fabrics for the sky and houses and ground and then embellish them. Well.......since I don't live in a traditional house, I sort of made up my own "dome" block (I hadn't learned about Snowball Blocks yet). It does not really look like my dome and the door is too large. I call this "Folk Art" at best :-)
It was fun to make and to think of different things to do on each block. I quickly decided that each door would get a different treatment and then just did whatever came to mind. Had a great time choosing fabrics, but would change many of them, if I was doing it over! I really dislike the lighter colored domes....especially the July block. The only real quilting I did on the blocks was to make the triangle and hexagon "skylights" that are typical of a dome. The only other quilting is in the red area around each block and I did that on machine.
I tried to photograph each of the "quadrants"....I have 16 blocks. This is January and February in the top row, and May and June in the bottom row. Some months get 2 blocks.
The other top 2 rows right side: March and April in the top row and June#2 and July in the bottom row.
Lower half left side: July #2 and August top row, and October and November in the bottom row. My favorite kitties are all scattered around on various blocks.
Bottom half of quilt right side: September #1 and 2 in the top row, and November #2 and December in the bottom row. Note the humongous squirrel on top of the dome in September 2....squirrels love to go over the top of the dome to get from one side to the other. We've had them peek in our skylight over our bed before.
I have close-ups of the blocks in the bottom 2 rows, but cannot get good shots of the top 2 rows without bringing in a ladder! Actually....far away is better on some of these :-)
This is a dome cross stitch that I did when we moved here and it looks more like the actual dome :-) I designed the pattern myself and my dad made the frame for me, so it has special meaning for me. I thought it was neat that he tried to make something that accented the odd shape of our house. Dad loved woodworking and I have other items he made.
You may not be able to click on all of these pictures and make them larger to see details because I screwed up loading them in the correct order and Blogger doesn't like that. I had to insert one of them after I was done. I wanted to take individual pictures of each block, but it is so hard with where it is hanging and they end up in weird perspective because you are looking upward at them. If I ever take it down, I will rephotograph it!
Subscribe to:
Posts (Atom)