Sunday, August 31, 2008

Lover's Knot....2000 to 2002

I started this one in 2000, but didn't find anyone to quilt it until 2 years later. I didn't belong to a quilt guild than and didn't know any other quilters. It was quilted by Kathy Maxwell with a rose pattern.This will fit either a twin bed or a double bed if you don't cover the pillows. I made some pillow shams from left-over blocks.

This was the first real pattern that I tried! It is a log cabin variation and I think I saw them do it on the Simply Quilts show and liked it so I hunted up a pattern. Eleanor Burns sells a pattern for it. I loved the fabrics I put in this one. I really like black in quilts, but not the "Amish" look.....I never use plain fabrics if I can help it. Tone on tone or small prints are my favorites for anything where I don't want a splashy print.
It was a fairly easy quilt and I would like to do another one that is big enough for our bed. I have only one quilt that really fits and I'm ready for something new! We need one to fit the higher deeper mattress we have now. I found a light grey rose print for the back of this quilt and was pleased that it matches the roses in the black fabric almost perfectly! I never made a label for this quilt.

A couple of the pictures I took with it outside.....one in the apple tree

One lying on the violets in the front yard. I really don't have a lot of good outdoor places to put quilts, but love the idea of photographing them in nature.

Friday, August 29, 2008

Butterfly Meanderings.......2002-2003

I always think of this one as a "spring" quilt and one year I took some quilts outside to take pictures of them with the spring flowers. These 2 are my favorite quilts for hanging in the apple tree :-)
This was a very simple quilt! Nothing but squares sewn together. I bought pre-cut 4" squares on Ebay that all have butterflies on them. I arranged them with the idea that I would quilt meandering butterfly flight paths along each particular fabric ending in a butterfly. Well.....this was my very first machine quilting attempt and I found it was harder than I thought it would be! I realized that I would not be able to quilt the butterflies at the end squares and that they would not show up anyway! So.....I added little 3-D butterflies here and there!

I loved all the fabrics! I tried to take a picture of the quilting, but it is hard to see on these colorful fabrics.

Two of the small butterflies I tacked on.

The label
I learned a several things from this quilt. I started it in 2002 and got the main body finished and didn't know what I wanted for a border. I took it with me to Seattle to visit my sister and we went to a quilt shop where I picked out 4 possible fabrics. She talked me into using all 4! She also taught me how to miter them together at the corners and they turned out better than I thought they might. The quilting was a learning process and after the thread broke for the 20th or so time, I was ready to scream, but I persevered and learned some patience!
Finished it up in 2003.
Small lap quilt.....54" square.

Flower Garden 9-Patch....2004

Just to show that I've tried more traditional quilts in more traditional colors :-)

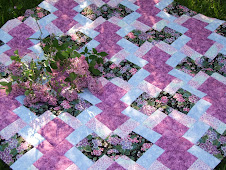
I seldom use much white in my quilts, but this was an exception.This is big enough for a double size bed and maybe just to cover the top of a queen.
It's simple 9-patches between snowball blocks.

I painstakingly hand quilted through the diagonals and then said: "that's enough of that!"
I have always intended to go back and quilt something in each snowball like it should have, but I have so little patience for hand quilting and a large project is very daunting for me!

I just wanted it to be done and use it.


I chose all small flowered prints for the 9-patches and then this beautiful piece of fabric that I didn't want to cut up for the back :-) I thought it would be nice to reverse it......however I mis-sized it and had to splice fabric on to each side to be big enough and then got the whole thing crooked when I basted it to quilt! Which becomes very obvious because I machine quilted around the border and the lines really show the crookedness on the back. Oh, well.....it was a nice thought and I can still turn it over for my own pleasure, if I want.
We learn as we go!

Thursday, August 28, 2008

Postcards.....2007-2008

Quilt projects aren't always large! Last year for our guild challenge we had to make some quilted postcards. These were fun! They can really be sent through the mail.....supposedly.....but you have to have them hand cancelled. I always tuck mine into an envelope to send them. The assortment I did for the challenge.

Most of mine end up looking like little crazy quilts.....my favorite type of embellishment.

This was my favorite, so I kept it for my own collection :-)


This was suppose to look oriental for my daughter who loves Asian stuff. If I copied it correctly it says "Laugh".


I sent this one to one of my sisters.


And this one to the other one.


I still have this one.

This was for a friend of my son's who lives in California.
I really liked this one and would like to make more similar to this one.
Right....its on my LONG list of unstarted projects :-)
This was for a friend's birthday

This one is unfinished. I have a spider web on it but need a spider!.....and maybe a few beads or something else....undecided.

The back is a simple piece of muslin that you can write on with permanent marker.

There are people who collect these and well known quilters who make them and exchange them or sell them. As you can see, I sewed my lines a bit crooked on the back of this one. I have trouble putting the edges on straight. Some people just satin stitch the edge on the machine, but I like the look of binding.....if I could get it on straight! It is fused on and then zigzagged rather then the ususal way.

I've seen cute ones with birthday cakes and candles, etc. One lady put photographs on fabric for them. You are only limited by your own imagination!

Wednesday, August 27, 2008

Mary's Quilt Thoughts #1....

A quilt looks different to a non-quilter than it does to a quilter. Both might appreciate its beauty, but the quilter will also look at how it is made and the color choices and the finishing touches. A quilter is usually critical of her own work, in ways that a non-quilter doesn't understand. It isn't that we don't like what we make, but we see how we could have made something better or what we wish we could change! Especially when we look back at our older projects :-)

Crazy Patch Garden....2006

(this first picture is NOT my quilt....just a pattern) I call my version of this quilt "Crazy Patch Garden". The "Kwik Krazy Also" pattern shown above was the one that I used, and it was a lot of fun, easy and has a lot of vesatility as to what you can do with it.

Obviously, I chose fabric that was much different than the pattern :-) I also chose to not sew my blocks next to each other but to add long strips of fabric in between.
I started with the flowered fabric that you see in the strips as my focal fabric. I fell in love with this beautiful piece of fabric and didn't want to cut it up! There is an entire book called: "Just Can't Cut It" by Pamela Mostek that gives suggestions for those wonderful fabrics that you hate to cut up. I used the colors in that fabric to choose my 12 fabrics for the squares. I have a tendency to use too many fabrics that all have the same "value" and not enough lights to give my quilts a better look.

These crazy squares are made by stacking 12 pieces of 12" fabric on top of each other and ironing a freezer paper pattern to the top one. Then you just use your rotary cutter to cut along the lines! Then you restack each pile by moving 1 piece in the first stack to the bottom, 2 pieces in the second stack to the bottom, etc. Now you have 12 blocks all alike except the colors have shifted around to different spots. Simple! Sewing them back together is a little trickier, but not really hard. Then you take your finished square and lay a 10 1/2" square ruler on top and trim them down to a perfect square. When you lay them out you can turn them any way you want to give further mixing. I first thought about actually doing crazy quilt stitching along some of the lines, but my quilt is so "colorful and busy" it doesn't really need it.

Once again, Linda B quilted it for me on her long-arm machine and I wish you could see the quilting. She quilted flowers in the floral fabric. This is the label that I added. I would like to use this technique for some more projects. I have seen a runner using the squares and the lady who did it, did do crazy quilt stitches on it. I love crazy quilts! I've also seen the squares spaced with simple sashing in between and that was lovely, too! All depends on what your fabric and your own personal tastes are.
My finished quilt is 64" X 69".

Tuesday, August 26, 2008

"Where Are The Cats".....2003

This is a favorite quilt of mine and it hangs in our entryway, which makes it hard to take pictures of. I had a few good ones from before it was hung and managed a couple more by standing halfway up the stairs.I had this "brainstorm" to make a quilt using all cat blocks, but to make them in colors so that they formed a picture of a cat sitting under a tree with fall leaves. It was fun to work on and another part of it was to "hide" 5 of my cats in it.....well the black cat isn't really hidden since he is suppose to look like a cat!
I'm not going to try to measure it but you can sort of tell the size here.


I need to splice these two pictures :-)

I machine quilted it and this was only my second attempt to machine quilt anything! I had no idea how to do the free-motion quilting except what I had read and seen on TV. I had an old sewing macine that you can't drop the feed dogs on which made it harder! My thread broke constantly, but I persevered and managed to do more or less what I wanted. I quilted poplar leaves (we always said they looked like cat heads) into the leaf areas, clouds (including a couple of cat shaped ones) in the sky area, and grass blades in the grass area.

I tried to photograph the kitty cloud :-)

I made this label for the back and wrote a poem that reads:
I see cats in the clouds,
I see cats in the trees,
But where are MY cats?
They're hiding from me!
For Whiskers, Hopey, Ozma, Nero and Mouse.
All of the "real cats" have eyes and hand stitched tails and mouths and noses.
This is Hopey and Ozma forming the branches of the tree.
I had to include Ozma's patchy throat to look like her :-)
Nero, was their brother who died of feline leukemia.

Whiskers was a lovely much-loved orange cat who died of cancer. He was easy to hide among the leaves.

Mouse....who we still have, lurking in the grass...which is pretty appropriate for her evil desire to attack feet.
I realized later that every quilt I did early on had embellishments on it and I seem to continue to make embellished quilts. I added the buttons to give the real cats their eyes, but then added more to help camouflage them by putting buttons on the fake cats.

Flip and Sew table runners.....2006-2007

I paid $3 to take this Flip and Sew Runner workshop through our guild.....what a deal!
I love this project and have made two for myself.
This is the everyday one...... The great thing about this project is you quilt it and make it all at the same time!
(You'll see a lot of my quilt projects photographed against this brown couch)
It is really an easy project! Once you have the pieces cut you just layer the backing fabric, the batting, and then draw a lines that establish the middle point and act as guides to adding the other pieces and keeping it straight (mine always go slightly crooked :-) As you sew each piece on it also becomes the quilting that holds it all together.
Many of the others taking this class prefer to put the same color pieces in a vee shape in each layer around the center square....I prefer a mixed up approach. Both ways look really nice. I've always been sort of an "asymmetrical person" :-)

Another thing I learned in this workshop was that they talked me into putting that little raspberry colored loose piece right before the binding. I had never done that and loved how it came out. You can't really tell what I mean in the pictures.

It is perfect on my buffet and matches my flower arrangement very well.

This past December, I made a Christmas version.

I love black fabrics in quilts.

This is the back of the Christmas one and technically they can always be turned over and the other side is usable too for a different look.

I used my new-found technique to create 3 Christmas presests that year.
This one was for my sister-in-law in Ohio.

Butterflies on the back

This one was for my sister in Seattle.

A nice fall back on this one.

Unfortunately I never took a picture of the one for my other sister-in-law and she has not found it yet, since she recently moved here to town. Maybe I'll add a picture of it eventually. I remember it was in greens, but that is all I remember!

Another nice thing about this simple design, is that you can make it as long as you want. You can also change the size of the borders to suit what you want. I tend to like a fairly short runner that fits on a 45" wide backing fabric so there is no seam. I think the original pattern calls for at least two more rows of bars. You are suppose to start with a 60" long piece of backing fabric and batting.