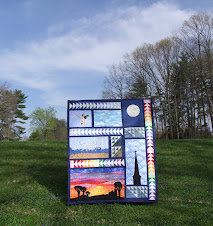
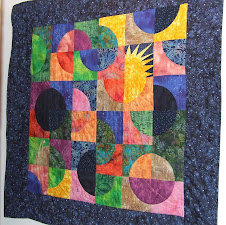
I seem to have gotten away from my chronicle of past quilts and stuff. These are some of the pillow shams that I've made. Pillow shams are a handy way to try out an idea and at the same time give a change of decor to the living room :-) This is a variation of Birds of the Air pattern.....sort of expanded! I actually call it "Fire on the Mountain" because I think that is more what it looks like! The main fabric has a sort of story behind it. The first year I went to the Paducah Quilt Show I was on a bus trip. After the show we stopped at the huge Hancock's Fabrics.......1000's of bolts of fabric! I was so in "shock" at seeing so much fabric that I sort of wandered around in a daze and couldn't decide what to buy! I finally bought 1 yard of fabric that I fell in love with....this background batik! I can't believe that I bought only 1 yard of fabric! Probably never happened to me in a quilt store since!
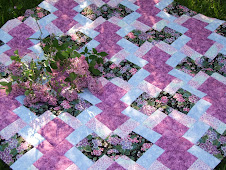
 Obviously I like the Snail Trail pattern! I think of these as my seasonal variations: Purple for spring, brown for fall (or most of the year), and red and green for Christmas!
 I wanted to try some "Flying Geese". I wish I had done them smaller and think I will make a new version some day.....when I have time.
 This was made from left over blocks. I started a Log Cabin quilt when I didn't really know what I was doing. The blocks were not all coming out the same size and I gave up on it. So.....one day I took some of the blocks and made this.
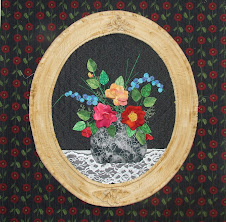
 I saw a Simply Quilts show on making this rose and was experimenting. I later used the same idea on a couple of bags. I wouldn't mind making a lot of them and putting them on a quilt some day.
 Sometimes I just use a single piece of fabric that compliments a quilt.
 ....or "cheater" fabric like this one that I just added borders and snowflakes to.
 A Christmas "Rail Fence" to cover a long pillow.
 And my Halloween "Boo"! I wish I had done the mouth differently. It is paint so I don't think I can change it. The boo on the header was cuter.....I made that one for my daughter, who probably doesn't even use it.
 This is a variation of Birds of the Air pattern.....sort of expanded! I actually call it "Fire on the Mountain" because I think that is more what it looks like! The main fabric has a sort of story behind it. The first year I went to the Paducah Quilt Show I was on a bus trip. After the show we stopped at the huge Hancock's Fabrics.......1000's of bolts of fabric! I was so in "shock" at seeing so much fabric that I sort of wandered around in a daze and couldn't decide what to buy! I finally bought 1 yard of fabric that I fell in love with....this background batik! I can't believe that I bought only 1 yard of fabric! Probably never happened to me in a quilt store since!
 Obviously I like the Snail Trail pattern! I think of these as my seasonal variations: Purple for spring, brown for fall (or most of the year), and red and green for Christmas!
 I wanted to try some "Flying Geese". I wish I had done them smaller and think I will make a new version some day.....when I have time.
 This was made from left over blocks. I started a Log Cabin quilt when I didn't really know what I was doing. The blocks were not all coming out the same size and I gave up on it. So.....one day I took some of the blocks and made this.
 I saw a Simply Quilts show on making this rose and was experimenting. I later used the same idea on a couple of bags. I wouldn't mind making a lot of them and putting them on a quilt some day.
 Sometimes I just use a single piece of fabric that compliments a quilt.
 ....or "cheater" fabric like this one that I just added borders and snowflakes to.
 A Christmas "Rail Fence" to cover a long pillow.
 And my Halloween "Boo"! I wish I had done the mouth differently. It is paint so I don't think I can change it. The boo on the header was cuter.....I made that one for my daughter, who probably doesn't even use it.