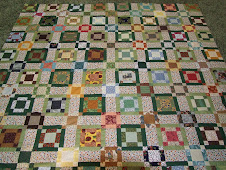
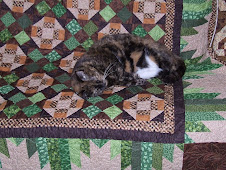
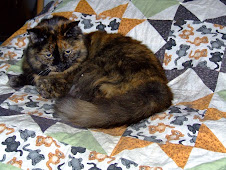
I finally added enough blocks and borders to my quilt to make it queen size. I had a lot of trouble choosing a border fabric, but I liked this one the minute I saw it in the Quilter's Nest quilt shop and decided it looked good with the various block colors. I can't get a good photo of it showing the colors....it is black, but with a dark brown, green, butterscotch, red, grey all mixed in. I thought it picked up a lot of the colors in the quilt and I like black fabrics.
The borders are very large....9 inch, but I wanted a nice hang.
I'm just happy to be done wrestling this around....unless I decide to quilt it myself! Now I need back fabric.
Monday, May 31, 2010
9-Patch/Puss in the Corner 2010.....
Sunday, May 23, 2010
Blogger's Quilt Festival.....Spring 2010

Someone sent me the link to Amy's very nice quilt site and this blogger festival, so I decided to enter :-) I've written about this quilt before, but am doing it again to fit the rules. You can click on any photo to see it larger.
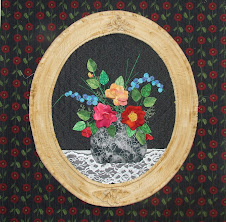
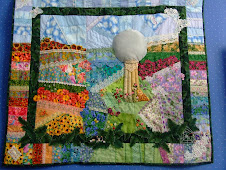
I call this wall hanging, "Not My Grandmother's Flower Garden...." (Sorry about showing it on the floor, but I can't get a good photo where it normally hangs)
The name reflects that this is not a "traditional" quilt pattern. I love to make things up, as well as do traditional quilts. This quilt was for the Raintree Quilt Guild challenge in 2006 to make a quilt involving flowers and nature. My grandmother loved flowers and had an elaborate flower garden that helped inspire my love for flowers. My favorite thing in her garden was the "gazing ball" or "garden ball".....whichever you call it! We had one in our garden as well and I loved looking at them. I decided I wanted to do a "crazy quilt" with a garden ball in the center! It was loads of fun to work on and I learned a lot making it.
I made up how to do the garden ball and its pedestal....both stuffed. The cats on the quilt are iron-on decals and the roses on the pedestal are store bought, but the rest of the flowers are my own ribbon work and embroidery. I had fun learning to make different things and do different stitches to embellish this quilt.
I put lace and beads and all sorts of stitches all over this thing! It is rather heavy :-) I had fun completing the flowers with embroidery that overlapped the sky areas or the border.
I'm not sure I like the 3-D fern border that I did...too wide....but it was another learning experience. All crazy quilts need a spider web and spider, so this is mine. The spider is a couple of buttons and some beads.
Cat hiding in the ferns.....I love cats, so there had to be a couple somewhere in the garden.
Many people might like the back of the quilt better than the front and no one even sees it! I used photos of my grandmother and my sisters and me in her garden by the garden ball and also a couple from our peony garden at home with its garden ball.
This was a very personal quilt and a labor of love! I enjoyed doing it and dedicated it to my Grandmother's memory.
I made a lot of mistakes and would change things, but that is part of quilting......learning with each project.
Tuesday, May 18, 2010
Updates on the quilts that I've been working on....
I've been working steadily on finishing two of the quilt tops that I started over the winter. "Steady" for me is a relative term :-) I get going in a frenzy and then come to a problem and stall for a long time and then finally get going again. This quilt came to a halt when I ran out of the black flowered fabric that is the focal fabric for the whole quilt. Thanks to a wonderful blogging friend...Rose, at Pics & Pieces.....I was able to get one more yard on the Internet. I wish it had been two yards, but at least the quilt now has borders that I like! 
It took almost every inch of the yard to get this far. I have none left for binding, so I haven't determined what I will bind it with....maybe a black tone on tone? I have the other fabrics in the quilt, but don't think any of them will look good for the binding. Now I need to buy some fabric for the back and get it to a machine quilter. I do love this quilt....it is a very generous lap size or perhaps even twin. I didn't measure it.
I only had two fat quarters of that stripe fabric, but was determined to use it in the border. It matched too perfectly to be left out :-)
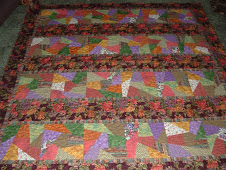
The other quilt that I have literally wrestled with for the past week, started out as a bunch of blocks in a workshop. I enjoyed making the blocks and thought I had plenty for a quilt....however I ended up eliminating any that had pink, red, purple, or very bright colors because they didn't look good with the pebble fabric I chose for the other blocks. I decided to use these "rail fence" blocks to set the other ones and love how it turned out. However it ended up taking a lot of blocks and still isn't quite big enough. I plan to add borders (don't know what), but it will be a bit skimpy in size unless the borders are huge! I'm turning this one into a "summer quilt" for our bed. I will not put batting in it and just back it with another piece of fabric to keep it very light weight. The more I look at those edges, the more I think I need to add one last narrow row to each side to complete the green squares around the other blocks...sigh. Sounds like a lot of fussy work, which I hate.
I know that I should just "bite the bullet" and go ahead and make more blocks and add a couple more rows in each direction, but I am so-ooooooo tired of making these blocks and with wrestling this queen size top around! This is more tiring then walking around taking photos of birds!
Maybe I'll procrastinate a bit longer and get up the energy to complete this the way it should be done.....or maybe not.
Saturday, May 1, 2010
Paducah Photos....
Here is a link to my Paducah Quilt Show photos. I didn't get every quilt, but I got enough to keep you busy and amazed :-)
Click here: Paducah Photos
Saturday, April 24, 2010
Some of the beautiful quilts at Paducah this year...
I'm putting photos of quilts from Paducah in all of my blogs. I will eventually get them in a album that can be viewed. I did not get photos of every quilt. However, I have a lot and here are a few of them. I put some nature themed ones in my Faith, Fabric, and Photos blog and I put 3 of my favorites in my This, That and the Other Thing blog. Click on any photo to see it larger.


Saturday, April 17, 2010
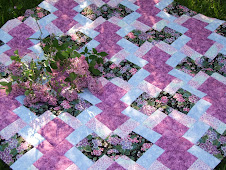
Lilac Time Tutorial for beginners.....
Using the numbers, you will then combine the following pairs of strips:
(2 1/2") #1 to the (4 1/2") #4
(2 1/2") #2 to the (4 1/2") #3
(2 1/2") #3 to the (4 1/2") #1
(2 1/2) #4 to the (4 1/2") #2
It looks complicated in writing, but when you have the strips cut and lay them out and look at your diagram, you will understand :-)
(BEGINNER NOTE:) All quilting is usually done with a quarter inch seam and you must get used to doing it accurately. My machine has a quarter inch foot with a metal piece that sticks down so as I lay the fabric next to it, it guides it along at a quarter inch. With some machines the foot itself is a quarter inch from the needle to the edge of the foot. Measure and find out. You can make your own guide by laying a ruler on the machine, lowering the needle to touch the quarter inch mark on the ruler, and then sticking a pad of sticky notes or some tape next to the edge of the ruler on the machine. Then use that tape/notes as your guide.
(BEGINNERS NOTE:) After laying the bottom edge of your strip along a line on your cutting board, slice off a small piece using the lines to give yourself a clean straight edge.
The strips with the 2 1/2" dark fabric are cut into 2 1/2" pieces all along the strip as shown above. (BEGINNER NOTE) For the most accurate cut lay one of the cross lines on your ruler on the seam line where the two pieces come together because the bottom edge may be a bit wavy.
For the strips with the 2 1/2" lighter fabric, cut the strips in 4 1/2" pieces in the same manner.
You will end up with the 4 sets show above and will combine them as shown at the bottom of this photo.
If you pressed all your seams to the dark, than when you look at the back of the pieces that are to go together you will see that one set of seams goes to the left and one to the right....excellent!
When you lay the two pieces right sides together to sew them, the seams will butt up to each other and nestle together. I'm stretching it a bit here to show how they come together. For a beginner you can stick a pin in to hold them. It is always important for these seams to come together perfectly for a nice looking finished block.
I sit down with the stacks of block and "chain piece" them. This is the process of sewing one and then feeding the next one under the needle without removing the first one so you end up with a "clothesline" of sewn blocks as shown below. It is a way to save thread and not have all the long ends of thread hanging off the blocks that have to be cut off and it is a fast way to do a whole lot of similar blocks in a short time. You will have to have quilted awhile to understand that!
Here is my clothesline of sewn blocks. Now you clip them apart and press them open.
You end up with two different finished blocks.
I lay them out on the floor or a bed in the right order and then start sewing rows together.
How many blocks and how many rows is up to you depending on the size quilt you want. I have not shown borders because I have not made any yet for my quilt top and am not sure what I will do for them. I ran out of black fabric and wanted it for the borders. I'm waiting for a piece of the black fabric that a quilting friend found for me on Etsy! A good reason to always buy plenty of fabric for a project!
I hope some of this made sense and was helpful. I'm not used to trying to tutor in a blog.
***************************************
I have to mention another method of making these blocks even though I didn't use the method. Eleanor Burns developed this method. From each of the 4 fabrics you would cut 4 1/2" squares and sew them into 9-patch blocks in the order shown on this diagram. ( I do not have enough fabric to use to demonstrate this method) Then lay your ruler on the middle of each 9-patch block and slice it both directions (dotted lines). This gives you 4 of each block from a 9-patch. Keep in mind that you would need two different 9-patch combinations as shown by the numbers in the diagram to get the 2 types of blocks needed.
***************************************
Subscribe to:
Posts (Atom)