Saturday, April 24, 2010

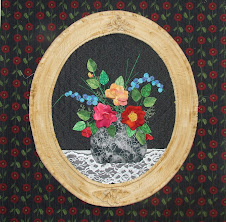
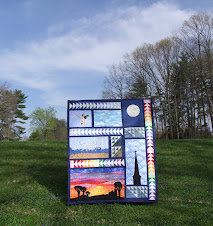
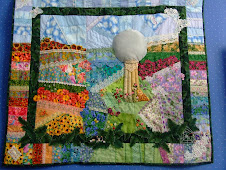
Some of the beautiful quilts at Paducah this year...

I'm putting photos of quilts from Paducah in all of my blogs. I will eventually get them in a album that can be viewed. I did not get photos of every quilt. However, I have a lot and here are a few of them. I put some nature themed ones in my Faith, Fabric, and Photos blog and I put 3 of my favorites in my This, That and the Other Thing blog. Click on any photo to see it larger.


Judy Morton from Newburgh, IN.....one of three who made this quilt.


Saturday, April 17, 2010

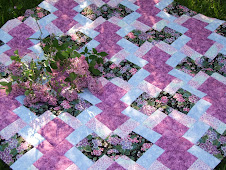
Lilac Time Tutorial for beginners.....

I was asked by two people to do a tutorial on this quilt. It isn't a hard quilt, but if you are a total beginner, it may seem a little confusing. I've tired to give very basic information for the true beginner. This quilt requires 4 different fabrics. Two that are sort of dark and two that are sort of light if you want nice contrast. I have numbered the 4 fabrics that I used and will refer to them by the number in the rest of these instructions.

I often make a diagram on graph paper to get the idea of how the colors will look and what order they will be in.

From each of the 4 fabrics you will be cutting 2 1/2" strips and 4 1/2" strips. It takes many strips of each depending on how big you want the quilt.
Using the numbers, you will then combine the following pairs of strips:
(2 1/2") #1 to the (4 1/2") #4
(2 1/2") #2 to the (4 1/2") #3
(2 1/2") #3 to the (4 1/2") #1
(2 1/2) #4 to the (4 1/2") #2
It looks complicated in writing, but when you have the strips cut and lay them out and look at your diagram, you will understand :-)

Lay one of the 2 1/2" strips right side down on the correct 4 1/2" strip and sew together with a quarter inch seam.
(BEGINNER NOTE:) All quilting is usually done with a quarter inch seam and you must get used to doing it accurately. My machine has a quarter inch foot with a metal piece that sticks down so as I lay the fabric next to it, it guides it along at a quarter inch. With some machines the foot itself is a quarter inch from the needle to the edge of the foot. Measure and find out. You can make your own guide by laying a ruler on the machine, lowering the needle to touch the quarter inch mark on the ruler, and then sticking a pad of sticky notes or some tape next to the edge of the ruler on the machine. Then use that tape/notes as your guide.

Your finished strips when pressed will look like this. (this is only two of the combinations)

(BEGINNER NOTE:) when pressing seams, I press from the top, gently pushing back the fabric against the sewn seam. A decision has to be made on which way to press the seam. If you are using light and dark fabrics you usually press towards the dark so the seam will not show through the lighter fabric. I pressed all of my strips for this quilt towards either #1 or #2. They always say to "press" and not "iron" in quilting. If you scrub away at the fabric with your iron in a normal ironing manner, you will stretch the fabric and inaccuracies will begin to creep in.

This is the back of the strip showing the seam pressed towards the darker fabric. I do not press my seams open in most cases.
Cutting the strips.
(BEGINNERS NOTE:) After laying the bottom edge of your strip along a line on your cutting board, slice off a small piece using the lines to give yourself a clean straight edge.

The strips with the 2 1/2" dark fabric are cut into 2 1/2" pieces all along the strip as shown above. (BEGINNER NOTE) For the most accurate cut lay one of the cross lines on your ruler on the seam line where the two pieces come together because the bottom edge may be a bit wavy.

For the strips with the 2 1/2" lighter fabric, cut the strips in 4 1/2" pieces in the same manner.
You will end up with the 4 sets show above and will combine them as shown at the bottom of this photo.
If you pressed all your seams to the dark, than when you look at the back of the pieces that are to go together you will see that one set of seams goes to the left and one to the right....excellent!

(This was a hard photo to hold and take at the same time!)
When you lay the two pieces right sides together to sew them, the seams will butt up to each other and nestle together. I'm stretching it a bit here to show how they come together. For a beginner you can stick a pin in to hold them. It is always important for these seams to come together perfectly for a nice looking finished block.

I sit down with the stacks of block and "chain piece" them. This is the process of sewing one and then feeding the next one under the needle without removing the first one so you end up with a "clothesline" of sewn blocks as shown below. It is a way to save thread and not have all the long ends of thread hanging off the blocks that have to be cut off and it is a fast way to do a whole lot of similar blocks in a short time. You will have to have quilted awhile to understand that!

Here is my clothesline of sewn blocks. Now you clip them apart and press them open.

You end up with two different finished blocks.

I lay them out on the floor or a bed in the right order and then start sewing rows together.
How many blocks and how many rows is up to you depending on the size quilt you want. I have not shown borders because I have not made any yet for my quilt top and am not sure what I will do for them. I ran out of black fabric and wanted it for the borders. I'm waiting for a piece of the black fabric that a quilting friend found for me on Etsy! A good reason to always buy plenty of fabric for a project!
I hope some of this made sense and was helpful. I'm not used to trying to tutor in a blog.
***************************************
I have to mention another method of making these blocks even though I didn't use the method. Eleanor Burns developed this method. From each of the 4 fabrics you would cut 4 1/2" squares and sew them into 9-patch blocks in the order shown on this diagram. ( I do not have enough fabric to use to demonstrate this method) Then lay your ruler on the middle of each 9-patch block and slice it both directions (dotted lines). This gives you 4 of each block from a 9-patch. Keep in mind that you would need two different 9-patch combinations as shown by the numbers in the diagram to get the 2 types of blocks needed.

Friday, April 9, 2010

"Lilac Time".....In progress....

Spring has sprung! It's lilac time! What better excuse do I need to start yet another quilt?? I chose these fabrics months ago and kept dragging my feet about starting on it. Couldn't decide if I liked the blue I chose. Well, with the lilacs blooming outside, I couldn't wait any longer! I'm already calling it "Lilac Time" :-)
This is a really simple pattern that only uses 4 fabrics. There are also two simple ways to make it depending on your idea of what is simple :-)

I haven't determined what size it will be yet....that may depend on how much fabric I have since I am using stuff from my stash.
The two blocks that make up the quilt can be made the Eleanor Burns way......make large 9-patches using 4 and half inch squares of fabric and then cut the large 9-patch blocks in half both directions for each of the two combinations.
or
I just cut 2 and half inch strips and 4 and a half inch strips and sew them together in the 4 combinations necessary and then cut them either into 2 and half inch pieces or 4 and half inch pieces as needed to recombine them for the 2 blocks. I was going to do a tutorial, but didn't take photos at all the right times. For any experienced quilter, they will understand easily what to do. I need to make more blocks, so if you are a beginner and want better photos, I will try to take some step-by-step.

Sunday, February 7, 2010

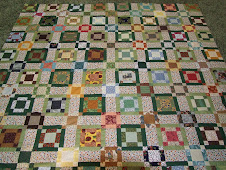
Finally quilted my Sudoku quilt.....

I finally quilted this Sudoku lap quilt on the machine. Any machine quilting is a struggle for me....even straight line like this one. Took me all day and I was so glad to be done with it.I'm still sewing down the binding so only two sides are done in the photo. It was interesting to see a Sudoku puzzle done in fabric, because many of the same fabrics end up next to each other consistently, which I did not realize until seeing it done "visually". And of course you can not change that and still have a correct solution to the puzzle! Would be fun to do a kid's "I spy" quilt this way.
This was suppose to be a Christmas present for one of my sisters, so it is about time I got it done! I really loved the colors and fabrics in it. These are my favorite colors in quilts usually....green, purple, black. I have one that I made for myself, too in different colors.....now I just have to psych myself up to quilt another one!......but not for a while.

Monday, February 1, 2010

Sizzling hot!.......

When it is cold and snowy outside what should you do? Start a "sizzling hot" orange quilt! This was a technique that I learned for a border as part of a class that I took with Janet Jones Worley to make her "Chocolate Ripple" quilt. I liked the look and have been wanting to use it again on something. The peaks of this make me think of "fire" so with the orange color it seemed like a good idea. Take two squares.....each cut 8 3/8".
Stack them right sides together, draw a diagonal, and sew 1/4" on each side of the diagonal line.

Cut them apart and iron them open, making two half-square triangle blocks.

Make two stacks. Turn them to face each other as shown. THIS IS IMPORTANT.

Slice each of the blocks in 2" pieces.

Rearrange their order as shown.

When both blocks are sliced and rearranged they look like this.

Sew them together and you have your first "sizzling" block!

I feel warmer already!
I'm combining different combinations of orange and hot gold. I've been doing a reverse block of each combination, also for variety. I don't know yet how I want to arrange them. There are lots of possibilities! When I get more made and decide how they are going to end up, I will do an update! But it is a fun block in any color combination. On my sidebar is a very different combo shown in greens and brown around my "2 Scoops Please" quilt from the "Chocolate Ripple" class.

Saturday, January 23, 2010

Puss in the Corner......


(I think this is also called Expanded 9-Patch. The quilt above was made by Cyndy A. who was our teacher for this workshop)


I took a workshop from our local quilt guild today and learned a fast way to make Puss in the Corner blocks. This may not be new to others, but it was new to me and I found myself getting a lot done in a short time! This block can be made any size you want, but these instructions are for making 5" finished blocks which will then be 4 1/2" when sewn into a quilt top.
Here are step-by-step instructions:1. Start with a large stack of 6" squares of fabrics. This is a great way to use up left-overs and make a nice scrappy quilt with an old-fashioned look.


2. Stack a pair of squares with right sides together. Make a cut at 3" and then one at 1 1/2" as shown above. (If you are starting with a different size make first cut at the half point and the second at half of one of the halves).

3. Sew the two dark strips to the side of the light half and the two light strips to the dark half.


4. Leaving the two sewn pieces folded lay them on your cutting board and....


5. ...cut them as you did before. Cut at the 3" mark and then cut one half again at the 1 1/2" mark.

6. Iron them open. Now put the pieces together as shown above, matching the corners of the squares.

7. Ta da! Now you have two Puss in the Corner blocks that are opposites of each other!


I found that if I cut a large stack of them with the first set of cuts, that I could than sit and chain piece them in pairs. Then I made my second cuts, ironed them open, and sat again to sew the final seams. This went quickly. I've made over 70 blocks already! They can be set in a quilt in many ways. They look very nice set on-point with a neutral fabric in-between.


Here are a bunch of my pairs pinned on the board. Should be a very scrappy look when I get done and is a great way to use up left-over pieces from other quilts. Obviously if you want all your blocks to look the same, this method won't work. You will always get a pair of opposites from your two originals. The nice part is you are never messing with little 2" squares. I also found that the corners matched up nicely in almost every case without me having to pin anything before sewing. A great time saver!

Wednesday, January 6, 2010

Doilies and lace......

Was posting some lace memories in my other blog....This, That and the Other Thing. Thought it might interest here, also. Check out Peggy's blog Antimacassars and D'Oyleys if you love doilies! She has some lovely stuff.